Introduction
In rotational molding, the mold interior isn't just tooling — it's the cosmetic master for every part it produces. Whatever texture lives on that aluminum wall gets transferred directly to the outer surface of the finished plastic part. Roto Dynamics puts it plainly: "The part surface finish is determined by the texture that is created on the mold surface during the mold making process."
That transfer relationship makes surface finish decisions critical well before the first production run. A mold with unresolved casting porosity, skipped grit steps, or the wrong blast media doesn't just look rough — it produces rough parts, run after run, until someone stops and fixes the mold.
Achieving a consistently smooth aluminum mold interior requires attention across four distinct stages:
- Casting quality — starting with dense, low-porosity aluminum
- Mechanical defect correction — addressing pits, seams, and surface flaws
- Progressive abrasive finishing — working through grit sequences without skipping steps
- Final treatment and measurement — confirming surface roughness before production
Shortcuts at any one stage carry forward into every part the mold produces. This guide covers what each stage requires and why the sequence matters.
Key Takeaways
- A high-quality casting pour sets your surface finish baseline — post-process sanding can't fully recover a poor start
- Skipping grit steps in abrasive progression leaves subsurface scratches that polishing makes more visible, not less
- The four highest-impact variables: casting surface quality, grit sequence, blast media type, and final Ra measurement
- Most failures trace back to casting porosity, wrong blast media, or polishing before mechanical irregularities are addressed
- For cosmetic, food-contact, or tight-tolerance parts, mold finish directly drives part quality, release performance, and run consistency
How to Achieve Smooth Surface Finish on Aluminum Molds
Smooth mold interiors don't result from a single finishing operation. Each stage must be completed correctly before moving to the next, and each stage's outcome sets the ceiling for everything that follows.
Step 1: Assess and Benchmark the As-Cast Surface
Before any grinding or sanding begins, measure what you're actually starting with.
Use a surface roughness gauge (profilometer) to record Ra values across multiple zones: flat faces, corners, parting lines, and any deep geometry. These measurements establish your baseline and reveal where finishing effort needs to concentrate. For context, sand castings typically fall in the 12.5–25 µm Ra range before any mechanical finishing — but the specific starting Ra of a given casting depends heavily on the foundry's pouring process and pattern quality.
Beyond roughness measurements, inspect visually and tactilely for:
- Porosity — gas or shrinkage voids exposed at the surface
- Inclusions — foreign material embedded in the casting
- Cold shuts — incomplete fusion lines where metal streams met
- Rough casting skin — irregular surface texture from the mold or pattern
LyondellBasell's rotational molding guide identifies a completely non-porous interior as the most important property of a rotational mold. Any porosity found at this stage must be addressed mechanically before abrasive finishing begins. Attempting to sand or polish over a pore doesn't fill it; it opens it further.
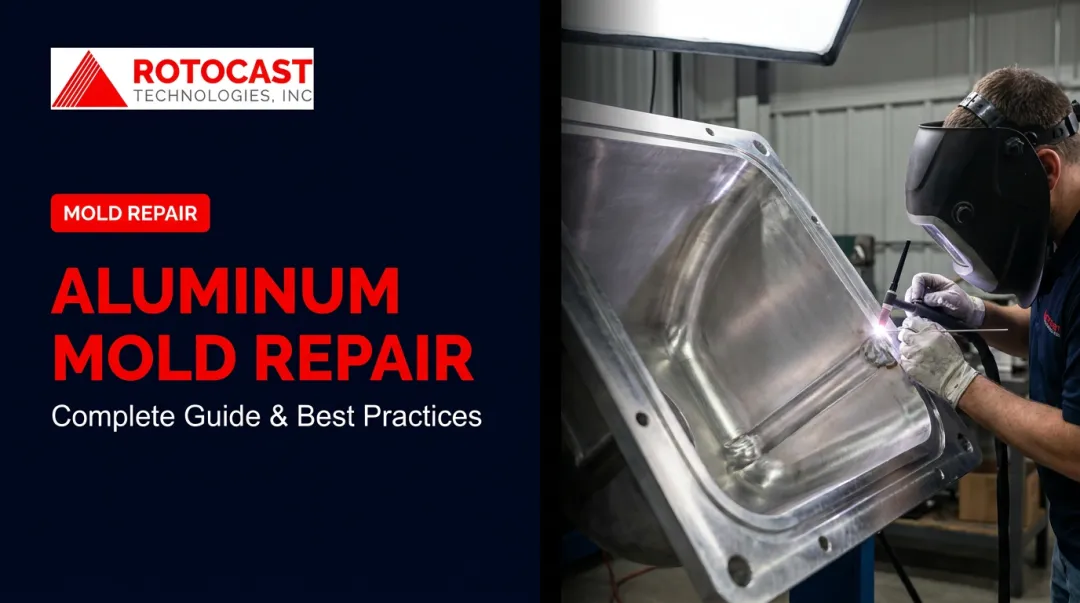
Step 2: Mechanical Grinding to Remove Casting Irregularities
With defects identified, address them before touching a sanding disc.
Use pneumatic die grinders or rotary burrs to remove:
- Casting flash and parting line ridges
- Surface irregularities left by the casting process
- Porous zones that require material removal before weld repair
This step establishes a uniform mechanical baseline across the entire mold interior, and it applies even to castings that look clean. Parting line ridges that seem minor at this stage will print clearly on finished parts if left unaddressed.
The starting quality of the casting directly determines how much grinding is required here. Rotocast Technologies uses A356.2 grade aluminum, which carries stricter chemical limits and higher ductility than standard 356.0, so castings arrive with a tighter, more consistent interior surface. That reduces the scope of mechanical correction needed before the abrasive sequence begins.
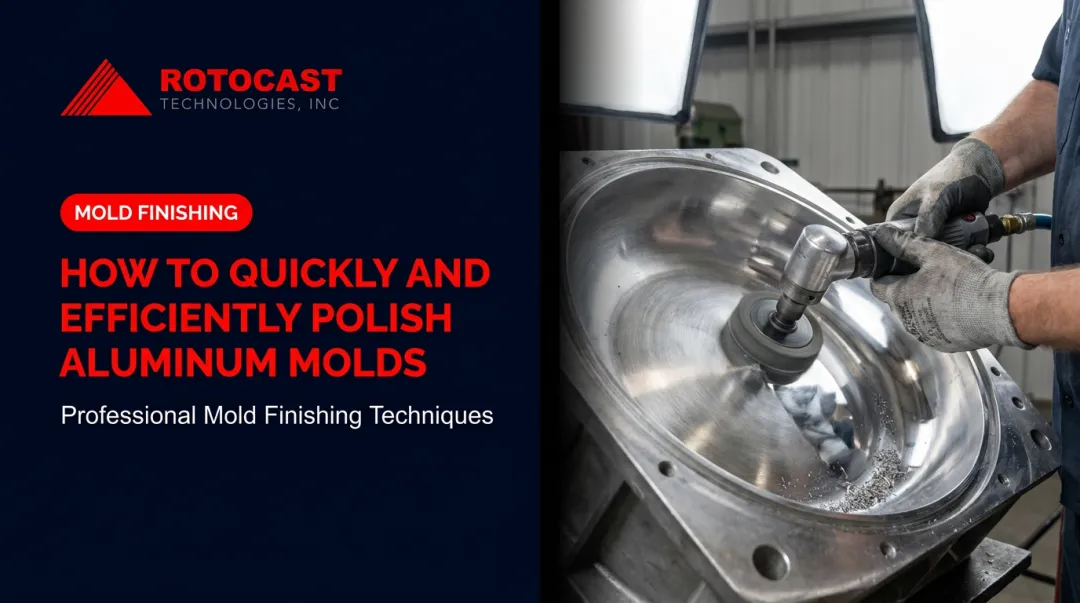
Step 3: Progressive Sanding from Coarse to Fine Grit
This is where most surface finish failures originate. Skipping grits or rushing the sequence doesn't save time — it creates rework.
The principle is straightforward: each grit must fully eliminate the scratch pattern left by the previous one before you advance. Diversified Mold & Castings lists hand-sand finishes for rotational molds at 180, 240, 320, 400, and 600 grit as distinct finish levels, each representing a measurable improvement over the last.
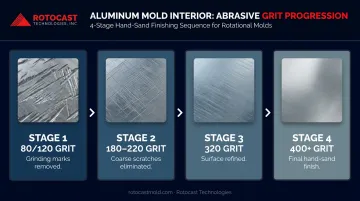
A typical progression for aluminum mold interiors:
- 80 or 120 grit — removes grinding marks from mechanical correction
- 180–220 grit — eliminates coarse sanding scratches, establishes intermediate surface
- 320 grit — refines the surface for fine finishing
- 400+ grit — approaches final hand-sand finish; required before any polishing
Key technique considerations:
- Change sanding direction by 90 degrees at each grit change — this lets you confirm the previous scratch pattern is gone before advancing
- Use flexible sanding tools and abrasive discs with backing blocks to maintain consistent pressure across curved or recessed surfaces
- Avoid over-dwelling in one area, which creates low spots or scalloping in the mold wall
Jumping grits — say, moving from 120 directly to 400 — is the most common error in this stage. The coarser scratch pattern doesn't disappear under a finer abrasive; it sits below the surface and re-emerges when polishing compounds are applied, requiring the finisher to return to the coarser grit and repeat the entire sequence.
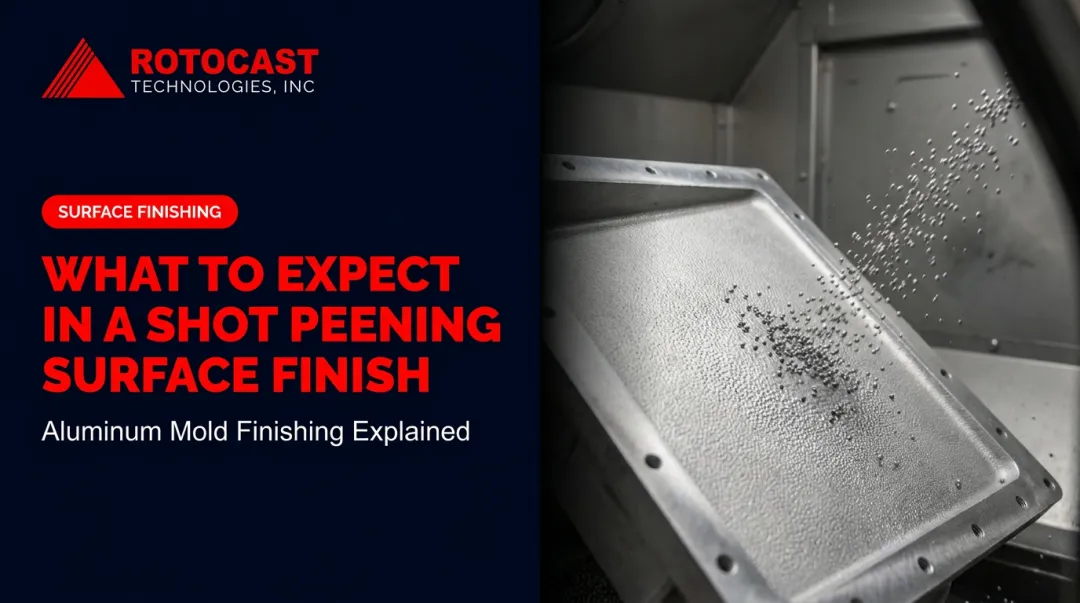
Step 4: Final Blasting, Polishing, and Surface Measurement
The appropriate finishing method depends on what the application requires. The three main options differ significantly in outcome:
| Method | Result | Best For |
|---|---|---|
| Glass bead blasting (20–50 psi) | Uniform matte surface | Texture/semi-matte part finishes; correcting hand-sand inconsistency |
| Shot blasting (harder media) | Peened, dimpled texture | Deliberate texture finishes only |
| Polishing compounds + buffing | Smoothest achievable surface | Cosmetic or high-gloss applications |
One note on blasting: as Clemco documents, parameters should always be validated on sample material before being applied to finished tooling. Pressure, nozzle distance, media type, and flow rate all affect the result, and Casting Source recommends glass beads at 20–50 psi for peening and polishing applications.
Rotocast Technologies' finishing technicians offer the full range of surface treatments: shot peen, sandblast, acid etch, hand-sand, and mirror polish, with Teflon coating available for molds requiring enhanced release performance.
Before the mold is approved for production, confirm the final Ra value with a profilometer. Measure at the same zones documented during the initial baseline assessment. Reference a named standard for surface acceptance — ASME B46.1-2019 or the ISO 21920 profile standard family — to ensure measurements are reproducible and meaningful.
Key Parameters That Affect Surface Finish Quality
Even with correct technique, outcomes vary based on controllable variables. Understanding these helps prevent rework before it happens.
Casting Surface Quality at Pour
The mold interior is a reproduction of the pattern it was cast from. A pattern with rough texture, tooling marks, or porosity produces a casting with those same characteristics embedded in the surface, raising the baseline Ra before any finishing begins.
Foundries with refined pouring processes and experienced pattern makers deliver castings that require substantially less mechanical correction. Rotocast Technologies' pattern makers work directly with the foundry team to optimize parting lines and casting geometry, producing the densest, highest-surface-quality castings in the industry.
Starting with a better casting translates directly to fewer finishing hours and more consistent Ra outcomes across mold sets.
Aluminum Alloy Composition
Rotocast uses A356.2 aluminum, which offers greater elongation, higher strength, and higher ductility than standard 356.0 (the result of stricter chemical limits and primary aluminum ingot stock). The alloy contains approximately 7% silicon, which creates a microstructure of hard silicon particles in a softer aluminum matrix.
PACE Technologies notes that this hardness differential can cause relief and smearing during preparation if finishing is too aggressive. The practical implication: moderate, controlled abrasive pressure at each grit stage produces better results on A356 aluminum than aggressive material removal.
Abrasive Grit Progression and Consistency
Three variables within a finisher's direct control have the largest single impact on final surface quality:
- Consistent pressure across the entire grit stage prevents low spots and uneven material removal
- Correct sanding motion ensures full coverage without directional scratching
- Complete scratch elimination at each grit level before progressing; skipping this step requires going back multiple stages
Inconsistent execution at any one of these points compounds through subsequent grits, adding time and risking dimensional loss.
Blasting Media Type and Pressure
| Media | Surface Result | Appropriate Use |
|---|---|---|
| Glass beads | Uniform, matte, round-bottomed dimples | Semi-matte finishes, uniform texture across mold |
| Steel shot | Peened, dimpled texture | Deliberate texture finishes |
| Sandblast media | Variable — depends on grit | Coarser texture or matte applications |
Blasting pressure also matters independently of media choice. Too high a pressure deforms the aluminum surface or creates uneven texture. Test parameters on a scrap piece of the same alloy before applying to the mold interior.
Common Mistakes When Finishing Aluminum Molds
Most surface finish failures are preventable — and most trace back to the same recurring errors. Catching these early saves significant rework time and scrap cost.
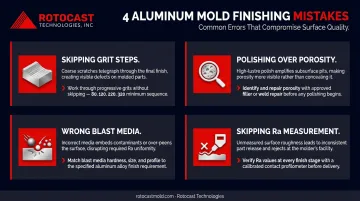
Four mistakes account for the majority of finish failures:
- Skipping grit steps leaves coarse scratches that fine abrasives and polishing compounds can't remove. The finisher typically discovers this only during final polishing — at which point restarting from the skipped grit is the only fix.
- Polishing over unresolved porosity makes subsurface defects more visible, not less. Any casting porosity or inclusions require mechanical correction or weld repair before abrasive finishing begins.
- Using the wrong blasting media for the finish target is a common spec mismatch. Steel shot suits texture finishes — not surfaces targeting a smooth or cosmetic Ra specification. Media selection must match the finish callout on the mold drawing.
- Skipping Ra measurement at key checkpoints removes the only reliable way to confirm progress. Without profilometer readings after grinding, sanding, and final blasting, roughness introduced at any stage won't be caught until the mold is already in production.
Troubleshooting Surface Finish Issues on Aluminum Molds
Most finish problems have a traceable cause once the symptom is correctly identified.
Visible Pitting Across the Mold Interior
Pitting usually traces back to one of two sources: subsurface casting porosity exposed during sanding or blasting, or overly aggressive blast pressure.
- Casting-origin pits (irregular, deep) require weld repair or filling before re-finishing
- Process-origin pits (uniform, shallow) call for reduced blast pressure and a media type review
- Re-measure Ra after correction, then restart the sanding sequence from the appropriate grit
Swirl Marks or Directional Scratch Patterns After Polishing
Root cause: Polishing advanced before the previous grit's scratch pattern was fully eliminated, or direction wasn't alternated between stages.
What to do: Return to the grit that introduced the visible scratch pattern and sand uniformly at a 90-degree change in direction. Once scratch elimination is confirmed, re-polish with a finer compound or reduced buffing pressure.
Uneven Texture Across the Mold Interior
Inconsistent sanding pressure, poor access to corners and recessed areas, or uneven blast coverage are the typical culprits here.
What to do: Use flexible abrasive tools for complex geometry. Apply layout fluid or a marking dye to reveal which areas are receiving full abrasive contact and which are being skipped. Re-blast with consistent standoff distance and overlapping passes.
Conclusion
Smooth surface finish on aluminum rotational molds is a process outcome — not a single operation. Consistent results require the right casting to start with, a complete mechanical correction stage, a disciplined abrasive grit sequence, and Ra confirmation before the mold enters production. Every stage builds on the last — a compromised casting means more grinding, more time, and more risk of defects carried into full production runs.
Rotocast Technologies has produced aluminum cast rotational molds from their Akron, Ohio foundry since 1956. Because surface quality starts at casting, their A356.2 pours, veteran pattern makers, and in-house foundry give finishing teams a better foundation — reducing the time and cost required to reach a production-ready surface specification. For mold repair, re-finishing, or new mold production, contact Rotocast at sales@rotocastmold.com or 330-203-2335.
Frequently Asked Questions
How do you achieve a smooth surface finish on aluminum molds?
Smooth surface finish is achieved through a staged process: start with a high-quality casting, mechanically remove all defects and irregularities, progress through a complete abrasive grit sequence without skipping steps, then confirm the final Ra value with a profilometer before approving the mold for production.
What finishes can you put on aluminum rotational molds?
Options include mechanical finishing (grinding, sanding, mirror polish), media blasting (glass bead, shot peen, sandblast), acid etching, and surface coatings such as PTFE/Teflon. Selection is driven by the target Ra value, part appearance requirements, and release performance — establish these criteria before specifying a finish.
What Ra value should aluminum rotational molds have?
Ra requirements vary by application. Food-contact surfaces must meet 3-A hygienic standards (≤0.8 µm Ra), while cosmetic or high-gloss parts have their own targets. Establish and document the required Ra on the mold drawing before finishing begins.
How does aluminum mold surface finish affect rotomolded parts?
The mold interior texture transfers directly to the exterior surface of the plastic part. A rough mold interior produces a rough part surface that may require secondary finishing, affect aesthetics, or compromise part function — on every cycle the mold runs.
What causes rough spots on aluminum mold interiors?
The most common causes are casting porosity or inclusions, skipped abrasive grit steps, uneven blast coverage, and unaddressed pattern irregularities carried into the casting.
Can you re-finish an aluminum mold that has developed surface issues in production?
Yes — worn surfaces typically need re-polishing only, while pitting or damage requires weld repair before restarting the abrasive sequence. A dense, high-quality original casting makes re-finishing significantly more straightforward.